Bronzer is a makeup product that adds warmth and a natural-looking glow to your face. It gives the skin a sun-kissed look, like you’ve spent a little time in the sun, without actually tanning. People use bronzer mainly to bring some color and life back to the skin, especially after using foundation, which can sometimes make the face look flat or too even. Bronzer helps your skin look healthier, warmer, and more awake.
Learning how to apply bronzer can enhance your face by adding subtle shadows in the right spots, giving it more shape. Choosing the right type and shade for your skin is key to achieving the best results. Using a bronzer that’s too dark or the wrong color can make your makeup look unnatural. The way you apply it also matters. With the right product and technique, bronzer can make your whole makeup look more complete and natural.
Choosing the Right Bronzer Shade
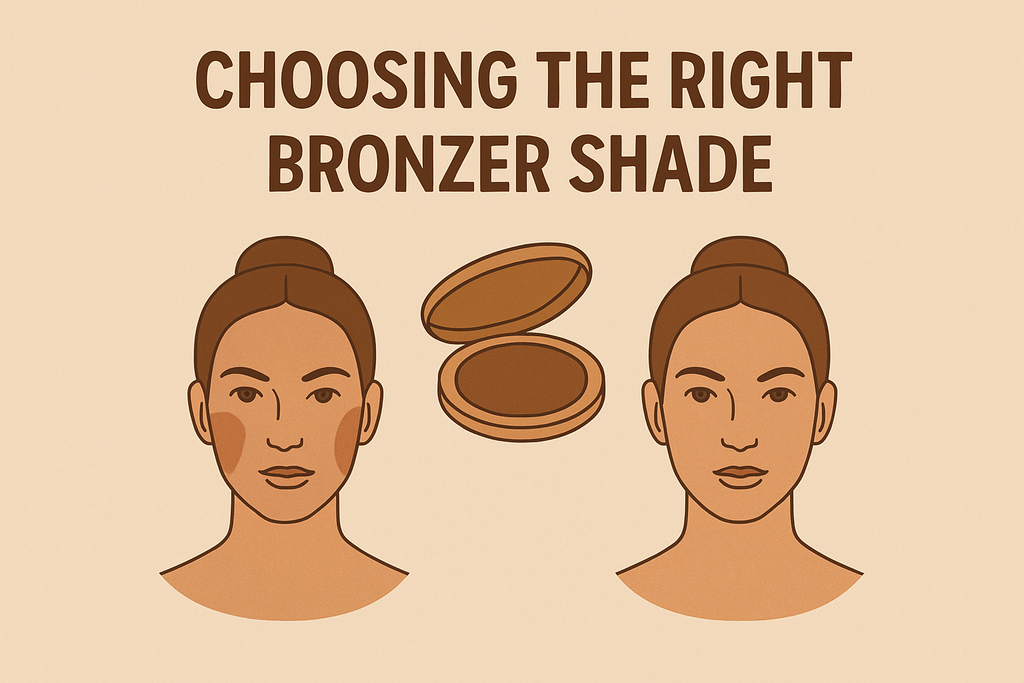
Picking the right bronzer shade is one of the most important steps for achieving a natural, sun-kissed look. A bronzer that’s too dark, too orange, or muddy can overpower your features and make the skin appear uneven. The goal is to create realistic warmth that looks like a natural glow rather than obvious makeup.
Start by selecting a bronzer that is about one to two shades darker than your natural skin tone. This slight depth gives the skin dimension without looking heavy or unnatural. Understanding how to apply bronzer means choosing the right shade for your skin. A bronzer that’s too dark can create harsh lines, while a shade that’s too light might not show up at all, leaving your makeup looking flat.
Matching the undertone of your bronzer to your skin’s undertone is just as important. If you have warm undertones, opt for bronzers with golden or peachy hues. Those with cool undertones should look for bronzers with a hint of rose or taupe. If your skin is neutral, you have the flexibility to wear both warm and cool bronzers, but it’s still best to avoid anything overly red or orange.
Steer clear of bronzers that lean too orange or muddy, as they can look artificial and clash with your complexion. Instead, look for shades that mimic the color your skin naturally turns after spending time in the sun. A believable bronzer should add soft warmth and a healthy finish without drawing attention to itself.
4 Different Types of Bronzers

Choosing the right bronzer formula can make a noticeable difference in how your makeup looks and wears throughout the day. Each type of bronzer offers its finish, texture, and skin benefits. Here’s a closer look at the main types available:
1. Powder Bronzer
Powder bronzer is the most traditional and widely used type. It typically comes in a pressed or loose form and is available in a range of matte, satin, and shimmer finishes. This type works especially well for people with oily or combination skin, as it helps control excess shine while adding warmth and dimension. Powder bronzers are easy to layer, which makes them beginner-friendly. They’re also ideal for more structured looks, since they allow for gradual build-up and are easy to blend into other powdered products like blush and setting powder.
2. Cream Bronzer
Cream bronzers have a soft, buttery texture that blends easily into the skin. They tend to give a more natural, skin-like finish, making them a popular choice for dry or normal skin types. Cream bronzers are often packaged in stick or compact form and are available in both matte and glowy formulas. Since they tend to melt into the skin, they offer a more seamless look, especially on textured or mature skin. They work well under or over foundation and pair easily with other cream-based products.
3. Gel Bronzer
Gel bronzers are thinner and more lightweight than creams. They typically have a water-based formula and offer a sheer tint that’s perfect for a subtle touch of color. Gel bronzers are ideal for low-maintenance routines or for those who prefer minimal makeup. Because of their sheer finish, they don’t provide intense definition but instead offer a soft, diffused warmth. These bronzers absorb quickly and tend to feel weightless on the skin, making them a solid option for hot or humid weather.
4. Liquid Bronzer
Liquid bronzers are fluid in texture and often come in bottles with a dropper or pump. They usually offer higher pigmentation than gels and can deliver either a matte or luminous finish, depending on the formula. Liquid bronzers are versatile—they can be mixed into foundation or moisturizer for an all-over glow or used more precisely to add warmth to specific areas. These bronzers work well for most skin types but require a bit more control during application because of their runnier texture. They’re a good pick for those who like a dewy, radiant finish and are comfortable blending liquid products into their routine.
How to Apply Powder, Gel/Cream, and Liquid Bronzers
How to Apply Powder Bronzer

- Start with a prepped base: Apply your foundation and concealer, then lightly set your face with translucent powder, especially in areas where you plan to apply bronzer. This helps the bronzer blend smoothly and prevents patchiness
- Use a fluffy bronzer brush. Swirl the brush in the bronzer, tap off excess product.
- Apply bronzer to areas where the sun naturally hits your face: tops of the cheeks, temples, forehead near the hairline, and bridge of the nose. Use sweeping or circular motions for a natural blend
- Avoid bringing bronzer too far down your forehead or under your cheekbones (that’s for contour). Focus on the high points for a sun-kissed effect.
- Blend well into the hairline and down the neck for a seamless finish.
How to Apply Gel or Cream Bronzer

- Choose a shade that matches your desired bronzed look and works for your skin tone.
- For best results, apply cream bronzer over cream or liquid foundation (not over powder) to avoid patchiness.
- With a stick or pan: Swipe or dot the bronzer on the cheekbones (just above or on the bone), temples, and forehead. For a more natural look, use a dense brush or your fingers to tap and blend the product outward toward the hairline.
- For fingers: Warm the product on the back of your hand, then tap onto the face, focusing on the cheekbones and high points.
- For gel bronzer: Squeeze a small amount onto your fingers, blend between your fingertips, then apply to cheeks, nose, and forehead. Layer for more intensity if desired. The gel formula is sheer and buildable.
- Always use a tapping motion rather than swiping to keep the finish natural and avoid disturbing the foundation underneath.
How to Apply Liquid Bronzer

- Apply after foundation but before powder products.
- Dispense a small amount onto the back of your hand or directly onto a brush.
- Work the product into the brush bristles for even application.
- Press (don’t buff) the bronzer onto the cheeks, temples, and forehead where the sun would hit. Avoid excessive buffing to prevent lifting the foundation.
- Use a damp beauty sponge to further blend and soften the edges for a seamless look.
- If desired, mix with a drop of color corrector to adjust undertone or intensity
A little goes a long way. You only need to apply bronzer in the places where the sun would naturally kiss and color your skin.
Comparison Table: Bronzer Application Methods
| Bronzer Type | Best Tools for Bronzing | Where to Apply Bronzer | Key Tips | Finish/Effect |
| Powder | Fluffy brush | Cheeks, temples, forehead, nose | Set face first, blend well, avoid patchiness | Matte or satin, buildable |
| Gel/Cream | Fingers, Dense brushes | Cheekbones, temples, forehead | Tap to blend, apply over cream/liquid foundation | Dewy, natural, luminous |
| Liquid | Brush, sponge, fingers | Cheeks, temples, forehead | Press (not buff), blend with sponge, layer as needed | Sheer, radiant, buildable |
Each bronzer formula offers a different finish and level of intensity. Powder is best for oily skin and a matte look, cream/gel for a dewy, skin-like finish, and liquid for seamless blending and layering. Always blend well and build up gradually for the most natural effect
Apply bronzer before blush and highlighter to create warmth and dimension
Bronzer Application Tips for Different Face Shapes
Bronzer can be a great tool for enhancing your natural face shape, adding warmth, and creating definition. The way you apply bronzer will vary depending on your face shape to ensure a balanced and flattering look. Here’s how to apply bronzer for different face shapes:
1. Round Face Shape
Goal: Add definition and contour to create more angles.
- Apply bronzer along the temples, near the hairline, to elongate the face.
- Sweep bronzer below the cheekbones, blending upward towards the ears to add structure.
- Contour the jawline lightly to add shape and reduce roundness.
- Avoid applying bronzer on the apples of the cheeks to prevent further roundness.
Tip: Focus on bronzing the outer edges of your face for a more oval, balanced appearance.
2. Oval Face Shape
Goal: Enhance the natural symmetry without adding too much contour.
- Apply bronzer lightly along the forehead and temples to maintain the natural shape of the face.
- Focus bronzer on the hollows of the cheekbones to create a subtle lift.
- Blend bronzer along the jawline for a smooth, cohesive look.
Tip: For a more sculpted appearance, apply a small amount of bronzer just below the chin to add definition without disrupting the natural balance of your features.
3. Square Face Shape
Goal: Soften angular features and create a more rounded look.
- Apply bronzer along the forehead, blending into the temples to soften the sharpness.
- Bronze below the cheekbones, blending downward to create softness around the jaw.
- Focus bronzer on the jawline but blend well to avoid harsh lines.
Tip: Apply bronzer in circular motions to soften the angles and create a more oval appearance.
4. Heart-Shaped Face
Goal: Balance a wide forehead and pointed chin by adding warmth to the lower part of the face.
- Bronze along the temples to reduce the width of the forehead.
- Apply bronzer along the jawline to help balance the narrowness of the chin.
- Add bronzer below the cheekbones to add depth and dimension.
Tip: Avoid bronzing the center of the forehead, as it can make the face appear top-heavy. Instead, focus on the lower half for balance.
5. Long/Rectangular Face Shape
Goal: Create the illusion of width and balance the face’s length.
- Bronze along the sides of the forehead to reduce the elongation of the face.
- Apply bronzer horizontally on the cheekbones, blending towards the ears to add width.
- Bronze lightly along the jawline and chin to make the face appear more balanced.
Tip: Avoid too much bronzer below the chin, as it can make the face look longer. Focus on creating width on the sides.
6. Diamond Face Shape
Goal: Soften the angles of the cheekbones and add balance to the chin and forehead.
- Apply bronzer on the forehead, blending towards the temples to reduce width at the top of the face.
- Bronze below the cheekbones, following the natural hollows to contour and soften sharp angles.
- Apply bronzer along the jawline, blending downward to add definition.
Tip: Focus on the outer edges of your face to create balance and soften the sharpness of the chin and cheekbones.
Difference Between Bronzing and Contouring Explained!

Bronzing
Bronzing is all about adding warmth and a sun-kissed glow to your face. It mimics the natural color of your skin when it’s exposed to the sun, giving you a radiant, healthy look. Bronzer is typically applied to areas where the sun would naturally hit, such as the forehead, cheekbones, nose, and chin. It helps to enhance the complexion, making the skin appear golden and glowing. Whether you use a powder, cream, or liquid, bronzer is usually warmer in tone, often with a slight shimmer or matte finish, depending on the desired effect. The goal of bronzing is not to change the shape of the face, but to bring life and warmth to the overall appearance.
Contouring
Contouring, on the other hand, is used to sculpt and define the face. The main goal of contouring is to create shadows and enhance the structure of the face. By applying darker shades along areas like the hollows of the cheeks, jawline, and sides of the nose, you can create the illusion of a more sculpted, defined face. Contour products tend to be cooler in tone, usually matte, to mimic natural shadow. Contouring requires more precision and blending to ensure the effect is subtle and realistic. It’s designed to emphasize certain features, such as sharper cheekbones or a more defined jawline, while creating a slimmer appearance overall.
Final Words:
Bronzer is a versatile product that brings life and warmth to your complexion, helping to add a natural sun-kissed glow. It’s not just about creating a tan; it’s about enhancing your features and giving your face depth. Knowing how to apply bronzer, whether it’s powder, cream, gel, or liquid, and choosing the right formula for your skin can truly elevate your makeup look. When applied correctly, bronzer can transform your face by adding dimension, definition, and a touch of radiance, making it an essential step in your makeup routine.
In Case You Missed It!